Tuesday, November 18, 2014

Current Work


Fiber Art Cards
Felted wool, embroidery, beadwork, (approx.  4"x8" to 8"x8")
photo by Amy Mackinaw

Shoulder Bags
Original silk-screened and block-printed designs, beaded, quilted (9"x11")
photo by Amy Mackinaw


Wallhangings: Wake-up Call Series
Fireweed
Felted wool, embroidery, beadwork (9"x17")
photo by Amy Mackinaw

Caribou Tracks
Felted wool, embroidery, beadwork (9"x17")
photo by Amy Mackinaw
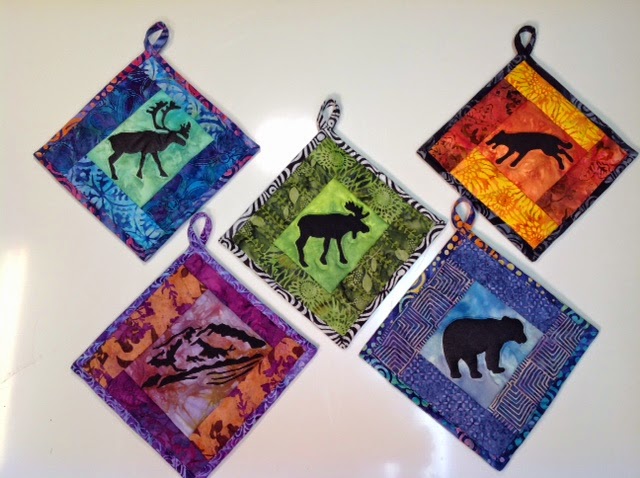
Quilted Potholders
Original silk-screened designs incorporating hand-dyed fabric, wool batting (8"x8")
photo by Amy Mackinaw
Vase Mat
Hand-dyed fabric, quilted, beaded, waterproof interlining (12" diam.)
photo by Amy Mackinaw


Fiber Art Cards
Various techniques: Free-motion quilting, raw-edge piecing, organza overlay (approx. 5"x7")
photo by Amy Mackinaw

Treasure Pouches
Felted wool, original quilted fabrics, beadwork, embroidery, Velcro closure (approx. 4"x6")
photo by Amy Mackinaw


Notecards
Original block-printed designs, illustrated quotes, various sizes
photo by Amy Mackinaw


Wednesday, November 12, 2014

Felted Wool Embellished


Caribou Wallhanging
Felted wool, embroidery, beadwork, handmade antler buttons (10"x12")
photo by Amy Mackinaw


Coffee Time Fiber Art Card
Felted wool, embroidery, beadwork (8"x8")
photo by Amy Mackinaw

Tuesday, November 11, 2014

A Day at the Office


photo by Amy Mackinaw

Monday, November 10, 2014

Upcoming Show

My final show for the year is the Tanana Valley Farmers Market Holiday Bazaar on Dec. 6 from 10-5 at the Carlson Center.  Free admission and a wonderful variety of some of the best local makers and growers.

Hope to see you there, and thanks to everyone for your support this year!


photo by Amy Mackinaw

Sunday, September 22, 2013

Creative Process

I was invited to speak about my creative process at an Osher Lifelong Learning session recently, and it was a great experience, reflecting on how things have evolved for me as a studio artist.

Sunday, July 14, 2013

Floral Immersion

I spend a good part of my time with my camera bent down to the ground for close-ups--rocks, feathers, moss, flowers.

Wild Rose (photo by Amy Mackinaw)

Arnica (photo by Amy Mackinaw)

Dwarf Dogwood (photo by Amy Mackinaw)

Nagoonberry (photo by Amy Mackinaw)

Fallen Fuchsia Blossoms (photo by Amy Mackinaw)

Columbine near Horsetail Falls, Keystone Canyon
(photo by Amy Mackinaw)

Friday, July 12, 2013

The Art of Camping


photo by Amy Mackinaw

Saturday, May 04, 2013

Persistent Resists

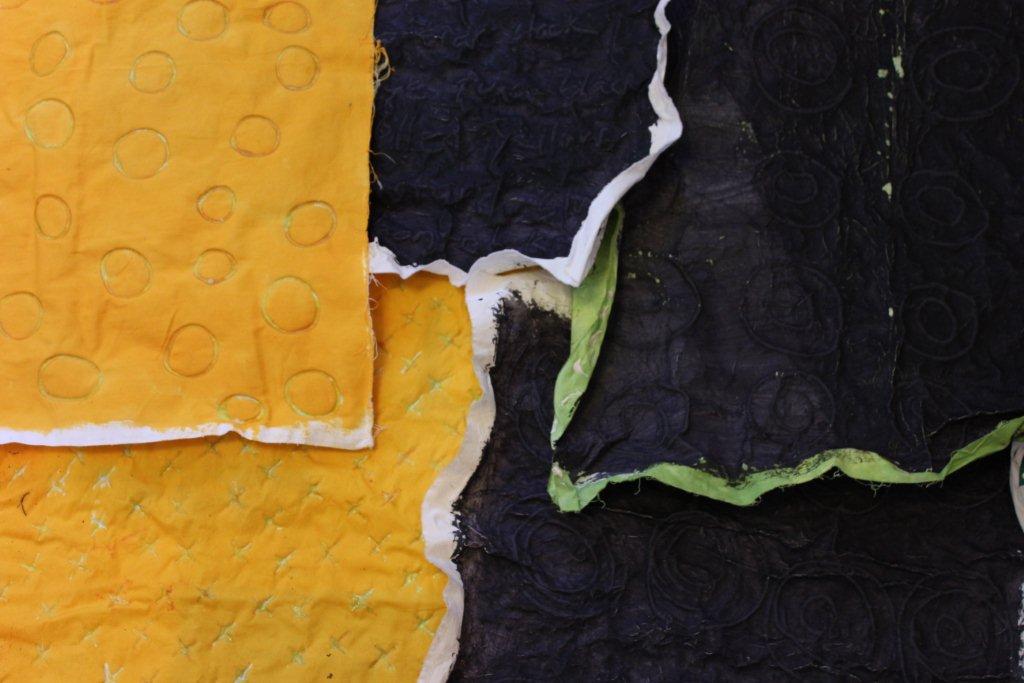
After multiple rinses and washing with Synthrapol, the flour paste and glue resists finally came out.  Lesson learned: do not wash the black dyed flour paste resists with other light colors.  Plenty of extra elbow grease was required.


photo by Amy Mackinaw

Wednesday, May 01, 2013

Resists

Here are back and front views of some recent resist dyes in progress, with both flour paste and Elmer's School blue gel glue, soon to be washed out.

Thursday, April 04, 2013

Interior Artisans Exhibition

Two of my recent pieces will be on display at the Interior Artisans Exhibition throughout April.

"Ins and Outs"  8"x8"x2" Zippered Bag
Gelatin plate printing on cotton, machine quilting, beadwork
photo by Amy Mackinaw
"Lithic"  5"x12" wallhanging
Hand-dyed cotton, polyester organza, beadwork
photo by Amy Mackinaw

Wednesday, January 16, 2013

Synchronicity

In the midst of freezing rain turned to snow and with an amaryllis blooming in the window, the mail carrier drove up with a nice fat flat-rate box from Hancock Fabrics.  Interestingly, the fabrics matched what was already going on around us.


photos by Amy Mackinaw

Saturday, November 10, 2012

Making

          I'm in the midst of reading Jane Dunnewold's newest book Art Cloth and can't say enough how wonderful it is to hear her acknowledge the importance of the "making" of our art.
So in honor of the making, I stepped out to my workshop and created this fiber art card for my mom, my mentor and inspiration.  It'll go in the mail tomorrow.

Tree           5 3/4" x 7"


Detail; hand-dyed and commercial cottons,
polyester organza, seed beads


Thursday, November 08, 2012

Mended Heart

          This fiber art card is going in the mail today to a friend with a mending heart.  Here's the order of the quilt sandwich from top to bottom:
*size 11 seed beeds, stitched on individually
*polyester organza (my eternal quest for the invisible organza is still on)
*machine embroidery (I always use quilting gloves to get a grip on the work)
*composition in cottons, no fusing necessary; the machine embroidery on top of the organza does the trick
*heavyweight Pellon--very stiff
*muslin (a.k.a. salvaged airplane wing cover)

          The next elements are added on the bottom after all the previous layers are stitched:
*fusible interfacing fused to the bottom muslin layer
*muslin
*binding is stitched on; stitch onto back first, fold over to front and stitch down close to edge; stitch another time around for design element


Sunday, October 14, 2012

Kickstart with gel printing

I needed a simple creative kickstart, so I tried gelatin mono printing. Here's my gel plate recipe:
-Mix one cup cold water with about 5 packets of Knox gelatin
-Add about 4 cups hot water
-Pour into a cookie sheet to about 1/2 inch deep
-Let set on counter until gelled enough to pick up without spilling
-Chill in refrigerator--or outside if the temps are cold, as mine currently are!

I dribbled Jacquard Textile paints on the surface of the gel and then used a Speedball brayer to spread the paint.
I drew the design with my finger.


I carefully laid the Kaufman Pimatex PFD cotton
onto the gel and rubbed gently.

Here's the fabric after the monoprint.

This was the series of the morning.  I also created texture with bubble wrap and a wine glass.
  These will be heat set and overdyed.

Of course, little helpers also want to give it a try!


Tuesday, September 04, 2012

Patterning

This is very soothing--a pen technique I'm learning from Zenspirations by Joanne Fink. The key is to take it slowly.  It looks similar to the Zentangles line drawing technique.

(4"x5 1/2") photo by Amy Mackinaw

Saturday, July 28, 2012

Ice Dyeing

Here are the steps I use to dye with ice:  Pre-soak the fabric (I'm using silk crepe de chine scarves) in a soda ash solution.  Squeeze out water and scrunch fabric into the bottom of a plastic container (dedicated to dyeing), layer with ice cubes, sprinkle with Procion MX dye (wearing a mask for protection, of course), and layer the whole thing again if desired with fabric, ice and dye.  Let sit for 24 hours at room temperature.  It can be hard to wait that long, but the surprises are worth waiting for.  Then rinse and wash out dye with Synthrapol.

The dye table is set up with ice, fabric, dyes, plastic spoons and containers.

Ice is sprinkled with dye using plastic spoons.

Cover the work with plastic wrap.

Wait 24 hours and unwrap.

The scarves have been rinsed, washed and tumble dried.

Here are the scarves after ironing.....mmmmmm....delicious.

Friday, July 06, 2012

Re-Re-cycled

This is a beautiful length of linen and two remains of cotton crocheted tablecloths from my mom's collection.  She used parts of the tablecloths for artwork in the 1960s and '70s when she was creating wallpieces that were collaged, gessoed, painted and antiqued. 

Now I have them, and after washing and drying on the grass today they'll join my stash.  Ideas are percolating.  What might you suggest?


 Handwork from another era.

Tuesday, June 26, 2012

Fiber Art Card gallery

Here is the photo of the mini gallery of fiber art cards displayed on the small wooden easels I made.  They are helpful for display and available for sale with the cards, if desired.

Mini Easels for card display (photo by Amy Mackinaw)

Monday, June 25, 2012

The view from the "wrong" side

Sometimes I'm surprised at the beauty of the back side of a project.  In this case, there was a lot of free machine embroidery.   Maybe I'll need to do more of this on the "right" side.   Are you ever inspired by the "wrong" side of your work?


Back


Front

Detail